Tuesday, November 28

Nov: Grilled Panzanella Salad

Well shoot me, but I wanted to squeak in one last summer recipe. After all that about the transition into autumn (see previous post) you may think I'm nuts (and I am) but believe it or not, we are still picking tomatoes from the garden! Anyway, let's kiss summer goodbye with this one.

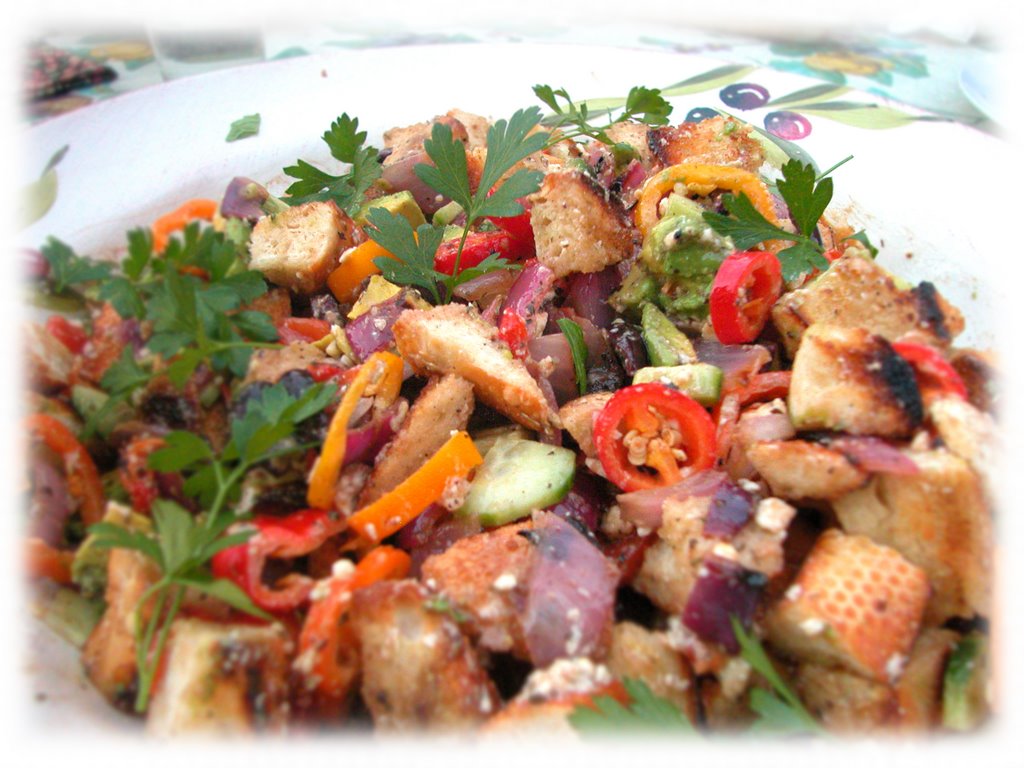
This recipe is summer at its best. It is so fresh and so tasty and so versatile. It is possible with this salad to add pretty much anything that is in season to it, and it will still turn out good. Grilling some of the ingredients in this salad make it a real treat. I even like to marinate some of them before grilling! This salad is one of our family favorites, and I really think you will enjoy it a lot.

Ingredients:
to grill...
1 loaf Italian crusty bread (or baguette)
1 red bell pepper (see "technique")
2 red onions, cut into 1 in. rings, lollipopped

toss together...
2 tomatoes, diced
1 cucumber, sliced thin or diced
Several small Italian sweet peppers, sliced (or another chopped red or green bell pepper)
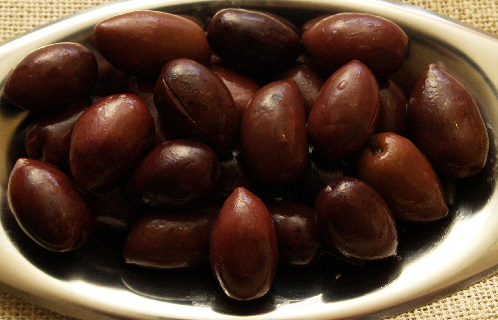
1/2 cup Kalamata olives, halved (see "special ingredient")
10+ large leaves of basil, rolled and sliced
10+ stems of parsley, chopped
1/2 cup feta, crumbled (grated Parmesan is good too, you could also use cubed fontina)

Whisk together...
1/4 red wine vinegar
1/4 lemon juice
2 cloves of garlic, minced
Salt (maybe about a 1/2 t or so)
Fresh ground black pepper to taste
Then whisk in...
1/2+ cup olive oil


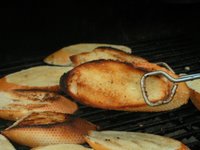
Slice the bread into 1 in. thick pieces then lightly butter both sides of each slice (some garlic added to the butter is really good). Grill or broil the bread until somewhat crusty and golden. If you don't toast the bread it will absorb too much of the dressing and become soggy. Grilling the bread adds a wonderful smoky flavor to it as well.

To char the pepper:
This can be done on the grill or underneath the broiler. Charring the pepper does a really neat thing to the flavor and texture of the pepper, and I use this technique quite a bit. If you want to skip this step, the supper market does sell jarred peppers under the label "roasted red bell peppers".
  1. If you are doing it on the grill, simply place it there and turn it until all sides are burnt. Don't worry about it turning black...that is the point. If you do this underneath the broiler, halve and seed the pepper before you char it.
  2. Take it off the grill and put it in a ziploc bag or container and seal. This loosens the skin for peeling and also softens the texture of the pepper.
  3. Peel the pepper then halve it and remove the seeds. Chop it into a 1/2 in. dice.


lollipopping the onion
is so that it doesn't fall apart on the grill. Simply insert a sk
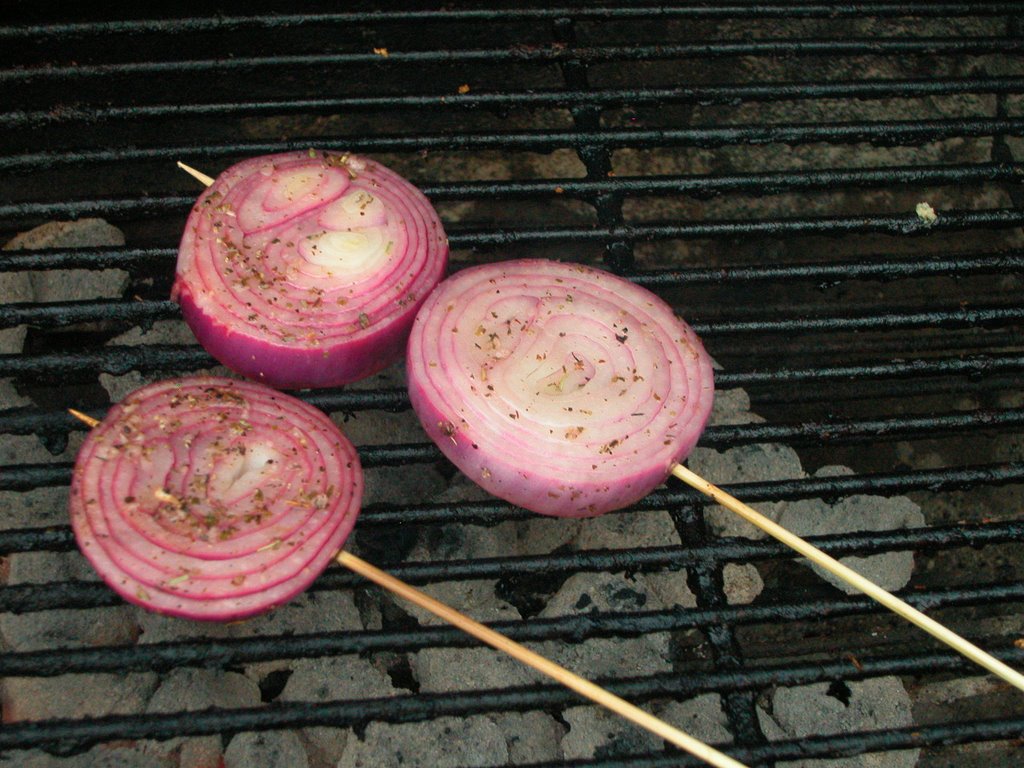
ewer threw the rings until it pokes out the other side. Be careful not to poke yourself. If you do two onions with one ring on each skewer you'll need four skewers. If you wanted to marinate them (recommended) put them in a ziploc bag with some olive oil, red wine vinegar, garlic, salt, pepper, and maybe some herbs and let them marinate for about a half hour before you grill them, flipping the bag halfway through. I also like to smother them with balsamic vinegar while they cook (onions done this way are one of my favorite things to grill and make a great side dish by themselves). When they are sufficiently grilled take them off and chop them.


When all the other ingredients and the dressing are all prep
ared (chopped, diced, sliced, etc), toss everything in a serving bowl and serve.

This salad is great with grilled anything (beef, steak, chicken, fish, eggplant, frog legs, etc.)


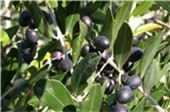
Special Ingredient: Calamata Olives
In case these are unfamiliar to some of you I thought I’d talk about them a little. Calamata (or Kalamata) olives originated in Greece and are largely used in its cuisine. They are purplish-black in color and almond shaped (about 1/2 to 1 in long). They are often packed in a wine vinegar marinade and have a wonderful rich and fruity flavor. Mezzetta® is a good brand and they are widely available in stores, but real imported ones are the best if you can find them. Pitted olives are time savers if you were to cut them, like you would in the salad. The olives still with the pits, frequently have a slit in them to absorb the flavor of the marinade in which they are soaked.


Monday, November 27

Autumn & The Harvest

With the way agriculture and preservation (and I suppose travel as well) have “advanced” the transition from one season to the other has become blurry. The results are that a lot of us don’t even know what ingredients are in season at any given moment. The fact that tomatoes and peaches are still at you fingertips in late November seems funny. It is both confusing and unnatural. Who would want salsa for Thanksgiving anyway? Cranberry relish sounds so much better! I believe to fully appreciate each season’s uniqueness we should bring in the harvest so to speak and eat of the bounty each day brings.

So let’s
talk about autumn a little. I like autumn (or fall, I just think autumn sounds more poetic, although it is harder to spell). I like to be out on a crisp yet warm autumn day, feeling the wind and smelling the dead leaves. And then by the next day it may be raining. But not all day. In the evening the clouds part just enough to make way for a beautiful sunset. This is autumn to me. A colorful yet desiccated preparation for winter. Slippers are once again finding there way out of the closets. Things are slowing down for us. And yet for nature it’s another story. The squirrels realize it’s now or never for their preparations. There is no time for goofing around with them. The deer are finding their mates and are coming down from the mountains trying to find water. And the Acorn Squash has given up on finding water and is dying for someone to pick it, which brings me back to one of my favorite aspects of autumn…the food.

Aww, it’s wonderful. It’s warmer; both in temperature and in taste. Fall is not the close of summer’s rich bounty; rather it’s the start of something entirely its own. Tom Colicchio in Think Like a Chef writes of the foods of fall and their characteristics, he says, “In autumn vegetables, the high notes of color and intensity settle into a bass line of starchier, sturdier varieties. To an extent, this reflects plants getting ready for winter, and our cooking reflects the same change as we prepare for the colder months. The flavors become mellow and darker, the textures get denser and richer, and in many ways, we have to do more with the ingredients to coax out their flavor”. How about braised pork shoulder with a buttery sweet potato and a few steamed Brussels sprouts with an apple cider sauce? I made up that menu just now. And how do I know all that will be good together? Because all those things are ripe now. They are IN SEASON. I believe if we eat and cook this way, we can experience each time of year more fully.

"The grim frost is at hand,
when the apples will fall thick,
almost thunderous,
on the hardened earth"
- D. H. Lawrence


Tuesday, November 21

Nov: Consider the Turkey

Brined and Basted Turkey

Well being as it’s Thanksgiving, I couldn’t help but to do something connecting to the holiday. And what relates more than a turkey! Here is the process of how I think one of those big birds should be prepared.


Brining:
Brining is a process of moisturizing and flavoring the meat with a salt/sugar and water solution (brines are also used to preserve foods, such as a pickle “brine” or an olive “brine”). The salt unravels meat proteins and squeezes out the natural juices like a sponge while the sugar, which has a large capacity to hold water, absorbs them back into the turkey with whatever other flavorings you have added to the meat. Don’t worry about the sugar; your bird will not turn out tasting like a cake. Although if done properly your finished product should be moist and flavorful. Your brine should be about 4 cups of water to ½ cup of both kosher salt and sugar per 6 pounds of bird (if you have an 18 lb turkey you could do 12 cups water and 1½ cups of both salt and sugar). It is best to get a turkey labeled “natural” being as it has been minimally processed. A lot of the frozen turkeys already have injections and there’s a possibility that it could get too salty if also brined (If you have one of the frozen turkeys, then you might cut the salt and sugar in the brine in half).

Here are some brine flavoring suggestions in addition to the water/salt/sugar base:

Spices (peppercorns, cinnamon stick, cloves, juniper berries, fennel seeds)
Tea
Maple
Honey
Orange
Soy Sauce (if you use this, reduce the salt)
Herbs (rosemary, thyme, sage, bay leaves, mint)
Garlic and/or Onion
Ginger

Possible combinations for the brine:

Soy sauce/Orange/Rosemary/Garlic

Tea/Juniper/Honey

Maple/Bay leaves/Peppercorns/Cloves/Cinnamon


Basting:
Have you ever seen pictures of Thanksgiving turkeys and wondered how they turn out looking so shiny and golden? What makes them so eye appealing? Well I believe the secret is basting. Basting is simple although it does require you to pay attention. You can’t just put the bird in the oven then pull it out after three hours. Looks isn’t the only thing basting is for...it also moisturizes the food as it cooks and prevents it somewhat form drying out. It also imparts additional flavor. You can baste what you’re cooking with the pan drippings, a sauce, or other liquid. For a turkey that shines like the picture I would use a pre-made sauce consisting of some sort of sweet syrup or liquid (like molasses, maple syrup, honey, apple cider, etc). The sugars will help the outside of it to caramelize and produce a glaze.

Possible combinations for the glaze:

Molasses/Apple Cider (or juice)/Butter

Maple Syrup/Ginger Puree (ginger, water, sugar)/Butter

Pomegranate/Balsamic Vinegar/Sugar/Butter

--------------------------------------------------------------------------------

So let’s finally make this turkey!
This recipe is for one 18 lb turkey.

For the Brine:

12 cups water

1½ cups kosher salt

1½ cups brown sugar

1 gallon sized tea bag

2 cinnamon sticks

8 whole cloves

1 T black peppercorns

6 bay leaves

Ice cubes

For the Baste:

¼ cup unsulphered molasses

1 cup apple cider

1 T dried thyme (or 8 stems fresh, tied together with a string or twisty tie)

1 stick butter (8 T) cut into about 6 pieces

Add the brine ingredients except for the tea bag in an appropriate sized pot and bring to a boil. Turn off heat and add the teabag, let that steep for 30 minutes. Add Ice cubes to chill or place in the fridge until it is chilled and you are ready to use it.

Put the turkey in a clean bucket and pour brine over it. Add water to cover. Most of the brining action takes place within the first 3 hours of soaking, and it shouldn’t be in there any longer than 24 hours as it could start to dry out. I would recommend maybe brining it overnight then pulling it out in the morning.

You can make the glaze up to 3 days ahead of time. Or you can make it 3 minutes ahead of time. Combine all ingredients except for the butter in a saucepan. Boil for three minutes. Add the butter then turn of heat. Swirl around until it melts.

To cook the turkey:

Preheat oven to 450-475 degrees.

Roast the turkey for 45 minutes breast side up at this temperature to give it a roasted flavor. Then turn the heat down to 350-375 to penetrate and cook the bird thoroughly. After you turn the heat down, baste the bird all over (as much as you can without flipping it) with a brush or spoon. Baste every 30 minutes until the turkey is done. The turkey is done when you insert a thermometer into the thickest part of the thigh and it reads 160° (about 1½ to 2 hours)

You can make this turkey, but you may have more fun making up your own combinations for the brine and glaze to fit what it is you want to accomplish.


Friday, November 17

What is Recipe of the Week?

My goals with Recipe of the Week are to weekly post a seasonal recipe and also to inspire you to have more confidence in your cooking. As many of you know, I am not really a recipe guy, meaning I am not a “slave” to recipes. Take, for instance, Rice Krispy Treats. They’re my favorite things in the world, and you should see me sweating over that box trying to make sure I’m doing precisely what it is telling me to, because I want them to turn out right! After all, the process of making the treaties is not the most ordinary. Let’s see: melt a lot of butter (exactly 3 tablespoons), melt 40 marshmallows (no less and no more), stir in six cups of cereal, dump in pan, flatten. Sounds pretty straightforward doesn’t it? So what’s my problem? It’s simple ─ a lack of confidence and a fear of flunking it. But will I ever learn anything if I always stick to the gooey details and never have any fun? I would do best to chuck that box and just rely on what I would call my instincts.

I have learned, as I cook more and more, a little about how those instincts develop. As you try different things, here and there, you will begin to feel more natural, and become more flexible with what you’re making. I believe cooking is a craft best learned through observation and practice. This means we must free ourselves from the tyranny of "the recipe.” A recipe can be a great guide, but many times you will know better than the recipe! After all, which comes first: the chef or the recipe?

Maybe you have had some bad experiences where one day you felt adventurous and altered a recipe in some way and it flopped. So you blamed it, not unnaturally, on your experiment. But just think how much you learned from that! I probably have had more “learning experiences” than anyone, from meat roasted until it is as tough and dry as a steer’s jaw muscle, to “drinkable” crème brulees, to things catching fire in the oven, to bread baked so undesirably dense that only David would eat it.

I must admit that some foods can be somewhat “intimidating" (Eggplant...EEEK!). Other foods are just so unfamiliar that you haven't a clue as to what to do with them (Parsnips?!). There is also that unsettling problem of not knowing whether or not a certain ingredient will go with, or in, whatever you’re making. One thing to always remember is “if it grows together, it goes together". Because really, the best culinary teachers are the ingredients themselves! THEY inspire what I make. How they react to different preparations and when they come into season are all important considerations in the creation of a dish. The goal here is to demystify the process and learn some basic techniques that will be helpful in making delicious meals.

If you don’t like to eat good food you will never be a good chef. You also need to enjoy seeing others utilize the sense of taste God has given them (or at least most of them). A big part of what motivates me as a chef is seeing others take pleasure in what I make.

Don’t get your hopes up too high: this isn’t a weekly magazine or newsletter or anything. Just some little hints and pointers to think about and try. I hope each one of you can develop your own style using this mindset; I don't intend to clone a bunch of chefs exactly like me, and the last thing I want to do is abolish recipes and then create another set of rules. In fact if I accomplish what I want to, you will be able to take the recipes I provide and alter them to your own personal taste. I know a lot of you have other things to tend to and can’t spend all day in the kitchen like me. But please don’t always try and make things as simple and basic as you can. Take some time, have your kids help, have some fun, and taste the difference.

Wednesday, November 15

hi

Don't give up on me, I'm still here.